Repeater Component
It gives us a repeatable data entry section that users can repeat “n” times. The user can add or remove section occurrences in runtime on the same screen.
The Repeater Screen component allows you to repeat a set of fields in a single screen element. You can create multiple records from one place without the need to navigate from the screen.
Business Challenge
Users cannot repeat sections consisting of multiple fields dynamically on the screen. Providing this feature helps users from navigating multiple screens to achieve it. For example, creating multiple contacts to an account needed to navigate through the “New Contact” screen several times.
Repeater Screen Component empowers users to add or update multiple records dynamically, such as contacts, cases, or opportunities, within a single interface.
With its intuitive design and seamless integration, the Repeater Component streamlines data entry processes, enhancing efficiency and productivity.
Requirement
We need to create a screen flow which mainly uses a repeater component to add multiple contacts dynamically in one screen and display the newly created contacts on the account page. The screen should have “add” and “remove” buttons.
By clicking add, the sections which contain multiple fields are repeated. It can be repeated n times by clicking the add button. By clicking the remove button the data entry section is removed. Upon clicking Next, the entered contacts are saved and displayed on the account page.
Steps to achieve the Requirement
- Create a Screen Flow
- Create Repeater Component and add to the screen
- Create a Loop
- Add an Assignment element
- Add a Create Record element to create Contacts
- Test the Flow
- Features of Repeater Component
- Comparison of Data Table and Repeater Component
1. Create a Screen Flow
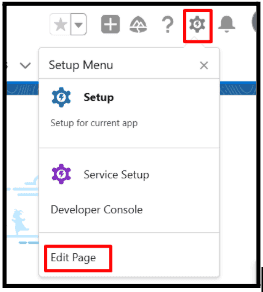
1.1. Login to Salesforce, and in your Salesforce org click the Gear icon and select Setup.
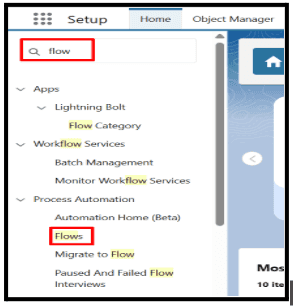
1.2. In the Quick find box find and click the Flows and then click New Flow.
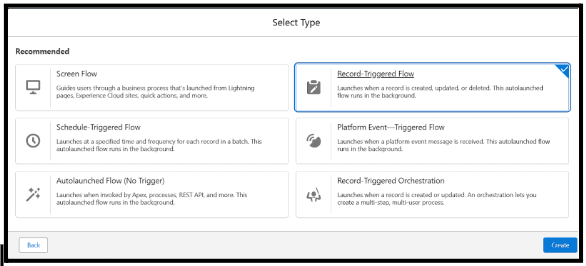
1.3.Click the Screen Flow and then click Create.
2. Add a Screen element and add Repeater Component inside the screen
2.1. Click the (+) icon below the Start element.
2.2. In the Search box type Screen to add the Screen elements and click it.
2.3. Give the Screen Label as Contact Information.
2.4. Drag And drop the Repeater Component inside the Screen Component and give the API name as Repeat_Contact and click Done.
2.5. Drag and drop the Text Component inside the Repeater Component and Label it as First Name.
2.6. Again drag the drop the Text Component inside the Repeater Component and Label it as Last Name.
3. Create a Loop
3.1. Click the (+) icon below the Screen element.
3.2. In the Search box, search for Loop and select the Loop Element.
3.3. Label the loop For Each Contact, and choose the Collection variable as shown below
3.3.1. Repeat_Contact.AllItems
4. Add an Assignment element
4.1. Click the (+) icon below the Loop element.
4.2. In the Search box, search for Assignment and select the Assignment element.
4.3. Label the Assignment element as Add all Contacts.
4.4. Create a New Resource with API name as ContactRecord
4.4.1. The Resource Type is Variable
4.4.2. Choose the Data Type as Record, and choose Contact as Object
4.5. Again create a New Resource with API name as AllContacts
4.5.1. The Resource Type is Variable
4.5.2. Choose the Data Type as Record, and choose Contact as Object and enable the Allow multiple values checkbox, and then click Done
4.6. Set the variable values.
4.6.1. ContactRecord.FirstName ->Equals ->For_Each_Contact.First_Name
4.6.2. ContactRecord.LastName -> Equals ->For_Each_Contact.Last_Name
4.6.3. Create a New Resource with API Name as recordid
4.6.3.1. The resource Type is Variable
4.6.3.2.The Data Type is Text and Enable the Available for input checkbox and then click Done.
4.6.4. ContactRecord.AccountId ->Equals ->recordid
4.6.5. AllContacts ->Add ->ContactRecord
5. Add a Create Record element to create Contacts
5.1. Click the (+) icon below the After Last in Loop element.
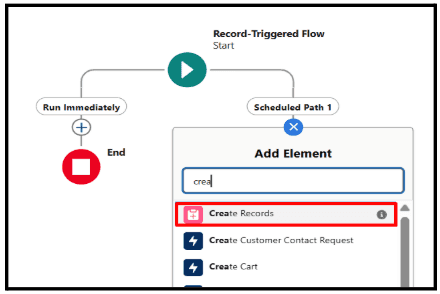
5.2. In the Search box type Create Record to create Contacts and then click Create Records element.
5.3. Label the record as Create Contacts.
5.3.1. Enable the Multiple Records to Create checkbox
5.3.2. Choose the Record Collection as AllContacts.
5.4. Save the Flow with flow label Create Contacts Using Repeater.
6. Test the Flow
6.1. This is the Screen Flow which uses the Repeater component to display the newly added contact in the account page.
6.2. There are no contacts under this particular account.
6.3. Now click on the debug option to test the flow.
6.4. Mention the particular recordid on which account page the contact needs to be added and click on Run.
6.5. An empty contact form appears with fields First Name and Last Name.
6.6. Now click on the Add button.
6.7. By clicking Add, the sections which contain fields we added are repeated, now click the Remove button.
6.8. Now three Contacts are Created by clicking the Add button with Name Test A1, Test A2, Test A3, and then click Next.
6.9. The flow is tested successfully with no error.
6.10. Now the three newly created contacts are saved and displayed in the particular account page.
7. Features
-
Using the Repeater component in a screen flow, it is possible to create, edit or delete multiple records within a single flow screen.
-
You can configure header and footer with different custom labels.











Leave a Comment