BUSINESS CHALLENGE
Sometimes the customers have lots of queries during the starting stages of opportunity. So the Business team wants us to create a case for the opportunity, when it reaches Certain Stage and then Opportunity moves through the sales path.
STEPS TO ACHIEVE THE REQUIREMENT
We can achieve this requirement either by using Record Triggered Flow or Apex Trigger
1. Create Record types for the Case Object.
2. Create Queues and Custom labels to assign the Case to the Owner.
3. Create a record-triggered flow on Opportunity.
4. Create Apex Trigger on Opportunity.
1. CREATE CASE RECORD TYPES
We need to create case Record types which we use later in the Record-trigger flow.
1.1 Login to Salesforce, and in your Salesforce org click the Gear icon and select Setup.
1.2 Then click on the Object manager.
1.3 Then select the CASE object from the list of Objects.
1.4 Go to Object types and click on it as shown in the below diagram.
1.5 Click on the NEW to create a new Object type for case.
1.6 Set the Record type details as shown in the below figure.
1.7 Let the case type be available for all Profiles.
1.8 Set Case layout as the layout for all profiles and then save it.
1.9 Create the Record types CaseA1, CaseA2 etc as mentioned above.
2.CREATE QUEUES AND CUSTOM LABELS
We need to create Queues and custom labels to set the case to an Owner in the Opportunity Record trigger flow.
2.1 Go to the Setup and click on Setup icon.
2.2 Search for QUEUES in the Quick find and click it.
2.3 Click the New button to create a new Queue.
2.4 Set the Label as Priority one , Queue name as Priority_One and give the Queue team email id. Select the Case as Object from the Available objects
2.5 Select the members for the Queue from Available members and save.
2.6 We can see the Priority one queue in the list of Queues.
2.7 Now we need to create the label for the Priority one Queue. Go to setup and type custom labels in Quick find and click it.
2.8 Click create New custom label button.
2.9 Before creating the label for Priority one, we need its ID. So go to setup, type Queues in Quick find, Open Queues. Click Priority one Queue and copy the ID in the link as given below in the screenshot.
2.10 Now paste the ID in the Priority one Label as given in the below screenshot.
3.CREATE RECORD TRIGGERED FLOW ON OPPORTUNITY
3.1.Create a Record-Trigger Flow
3.1.1 From the home screen,click on the gear icon at the top – Go to setup.
3.1.2 From the Quick find search and select Flows → Click New Flow.
3.1.3 Select RecordTriggered Flow → Click Create.
3.1.4 By default the layout is set to Auto Layout. Edit the start button
3.1.5 Select Object as Opportunity
3.1.5.1 Choose “A record is Created or Updated” option for “Configure Trigger”.
3.1.5.2 Choose All Conditions Are Met (AND) for the condition requirements.
3.1.5.3 Set the following condition as mentioned in the screenshot below:
Stage Name →Equals→Qualification
3.1.5.4 Optimize the flow for → Select Actions and Related Records.
3.1.5.5 Under when to run the flow for Updated records, Select Only when a record
Is updated to meet the condition requirements.
3.1.5.6 Leave the other settings as default.
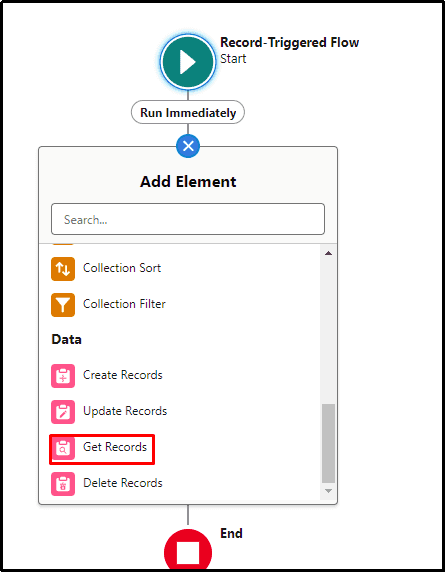
3.2.Add Get Record element.
- 2.1.Select (+) icon → Select Get Records Element
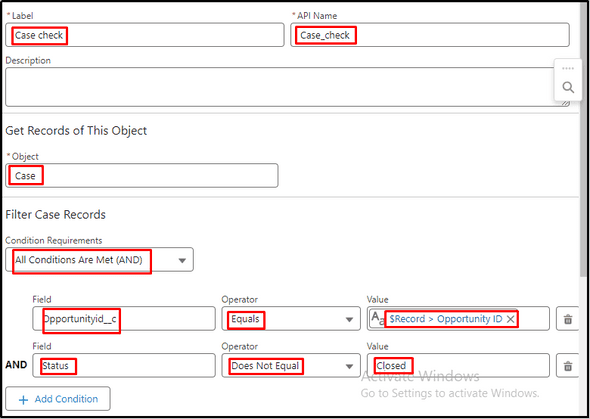
3.2.2 Enter Case check as the Label. Select Object as Case.
- 2.2.1 Choose All Conditions Are Met (AND) for the condition requirements.
3.2.2.2 Set the following conditions as mentioned in the screenshot below
Opportunityid__c→Equals→Record→Opportunity ID
Status→Does not Equal→Closed
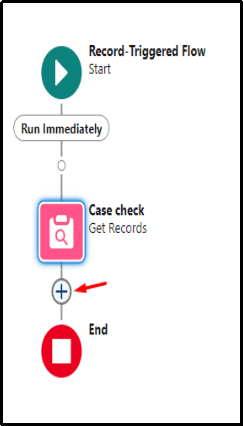
3.3 Add a Decision Element.
Select(+) button to add the Decision element.
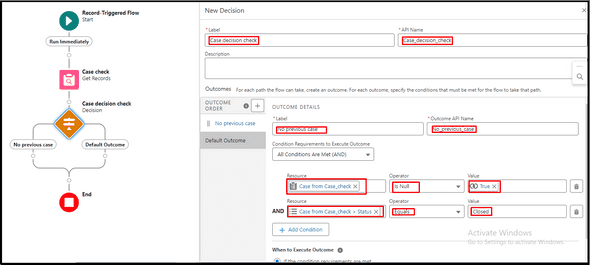
3.3.1 Add Case Decision Check as LABEL.
3.3.1.1 Select one Outcome label as No Previous Case
3.3.1.2 Choose All Conditions Are Met (AND) for the condition requirements.
3.3.1.3 Set the following conditions as mentioned in the screenshot below:
Case from case_check→is Null→True
Case from Case_check.Status→Equals→Closed
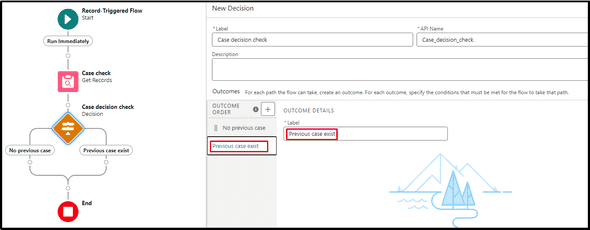
3.3.2 Select the default outcome as Previous case exists.
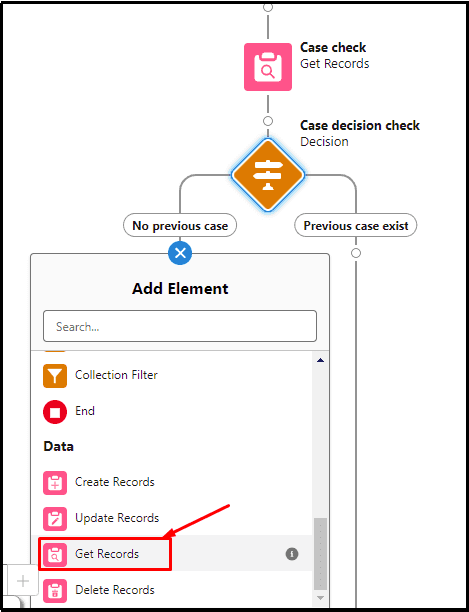
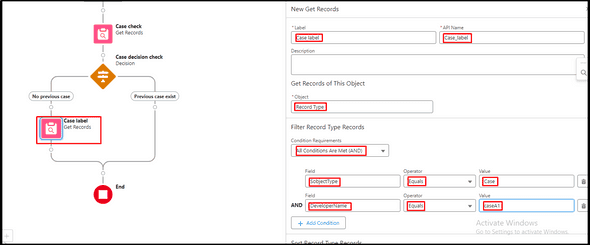
3.4 Add a Get Record element in the No previous case outcome path.
3.4.1 Give the LABEL as a Case label.
3.4.2 Select the object as Record type.
3.4.3 Choose All Conditions Are Met (AND) for the condition requirements.
3.4.4 Set the following conditions as mentioned in the screenshot below:
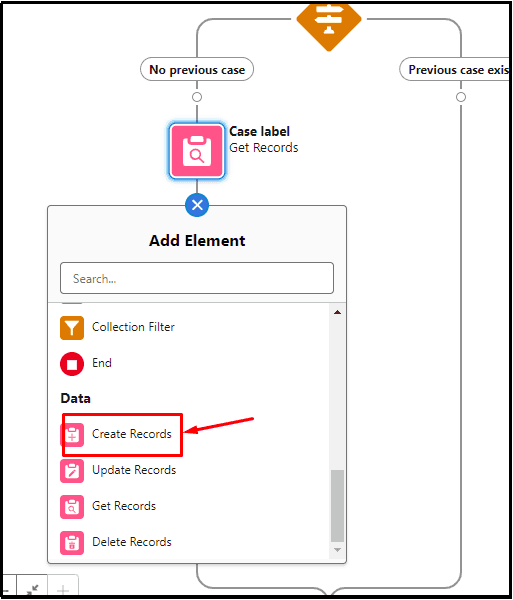
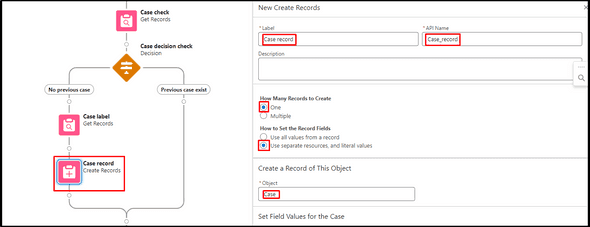
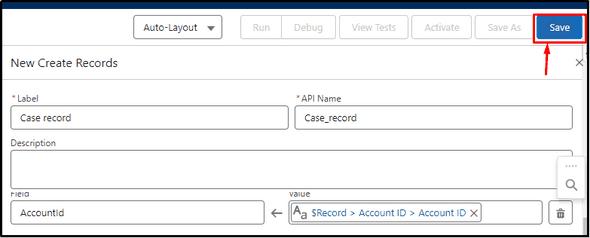
3.5 Add Create Records element to create Case Record.
3.5.1 Set LABEL as Case Record.
3.5.2 Set Records to create→ ONE.
3.5.3 Set the Record Fields to Use Seperate resources and Literal values.
3.5.4 Select CASE as Object.
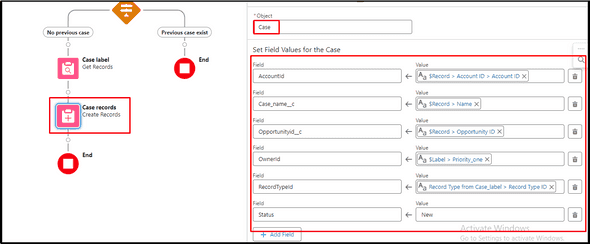
3.5.5 Set the following conditions as mentioned in the screenshot below:
AccountID→Record Account ID.Account ID
Case_name_c→Record.name
OpportunityID_C→Record.Opportunity ID
OwnerID→Label.Priority_On
RecordTypeId→Record Type from Case_label.Record Type_ID
Status→new
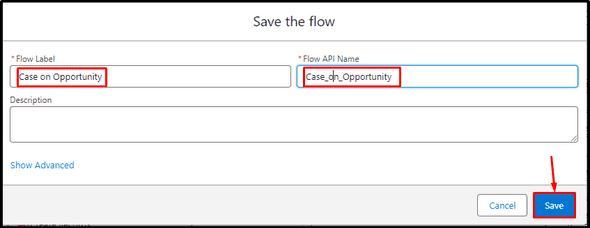
3.5.6 Save the flow with the flow label as Case on Opportunity.
3.5.7 Activate the flow
4.APEX TRIGGER ON OPPORTUNITY
4.1 Write an Apex trigger for the Opportunity object.
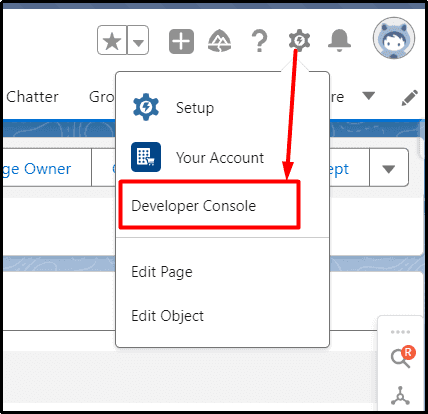
4.1.1 Go to Set up and select the Developer console.
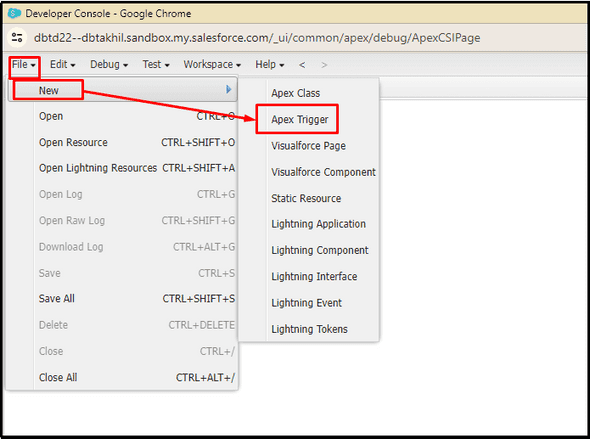
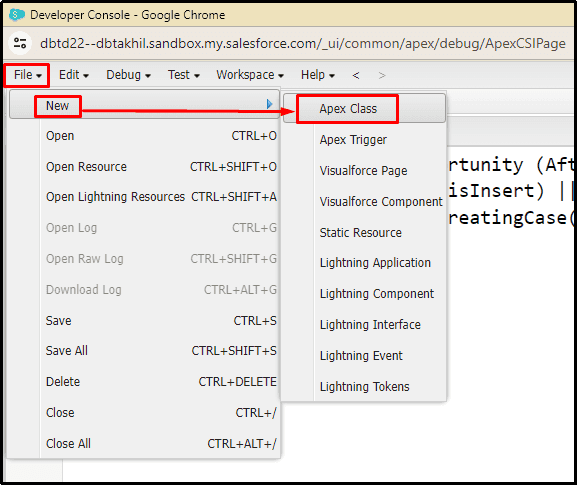
4.1.2 Select File→New→Apex Trigger
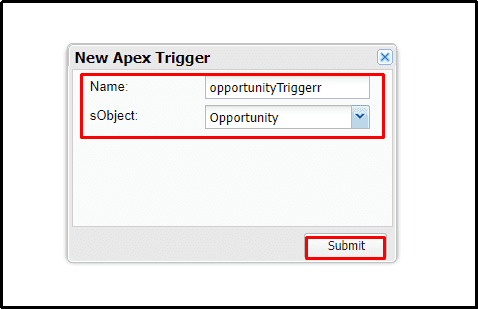
4.1.3.Give the filename as opportunityTriggerr and select object as Opportunity and submit.
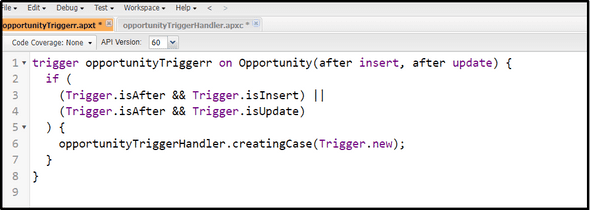
4.1.4 Now write the Trigger code in the file as shown in the below image.
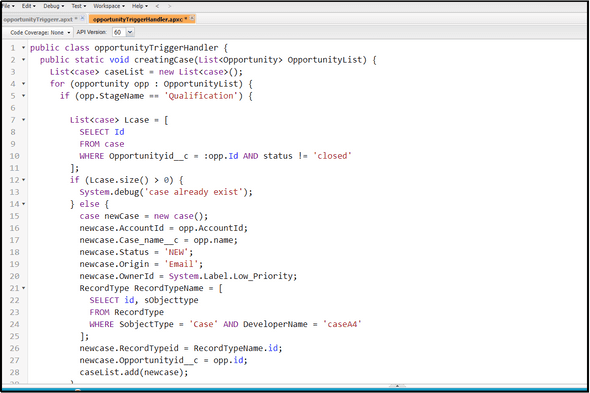
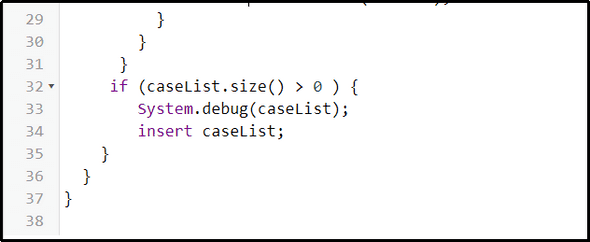
4.2 Now write a Trigger handler for the above opportunitytriggerr trigger.
4.2.1 Go to File→New→Apex class
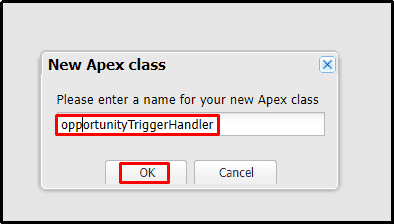
4.2.2 Save the file as opportunityTriggerHandler.
4.2.3 Write the code in the file as shown in the below
WRAPPING IT UP
In this blog, we explained how to create Record types and Queues for an Object. We also created a case for an Opportunity when it reaches a certain stage using Record trigger flow and Apex Trigger











Leave a Comment